WHAT IS A GUTTER MITER?
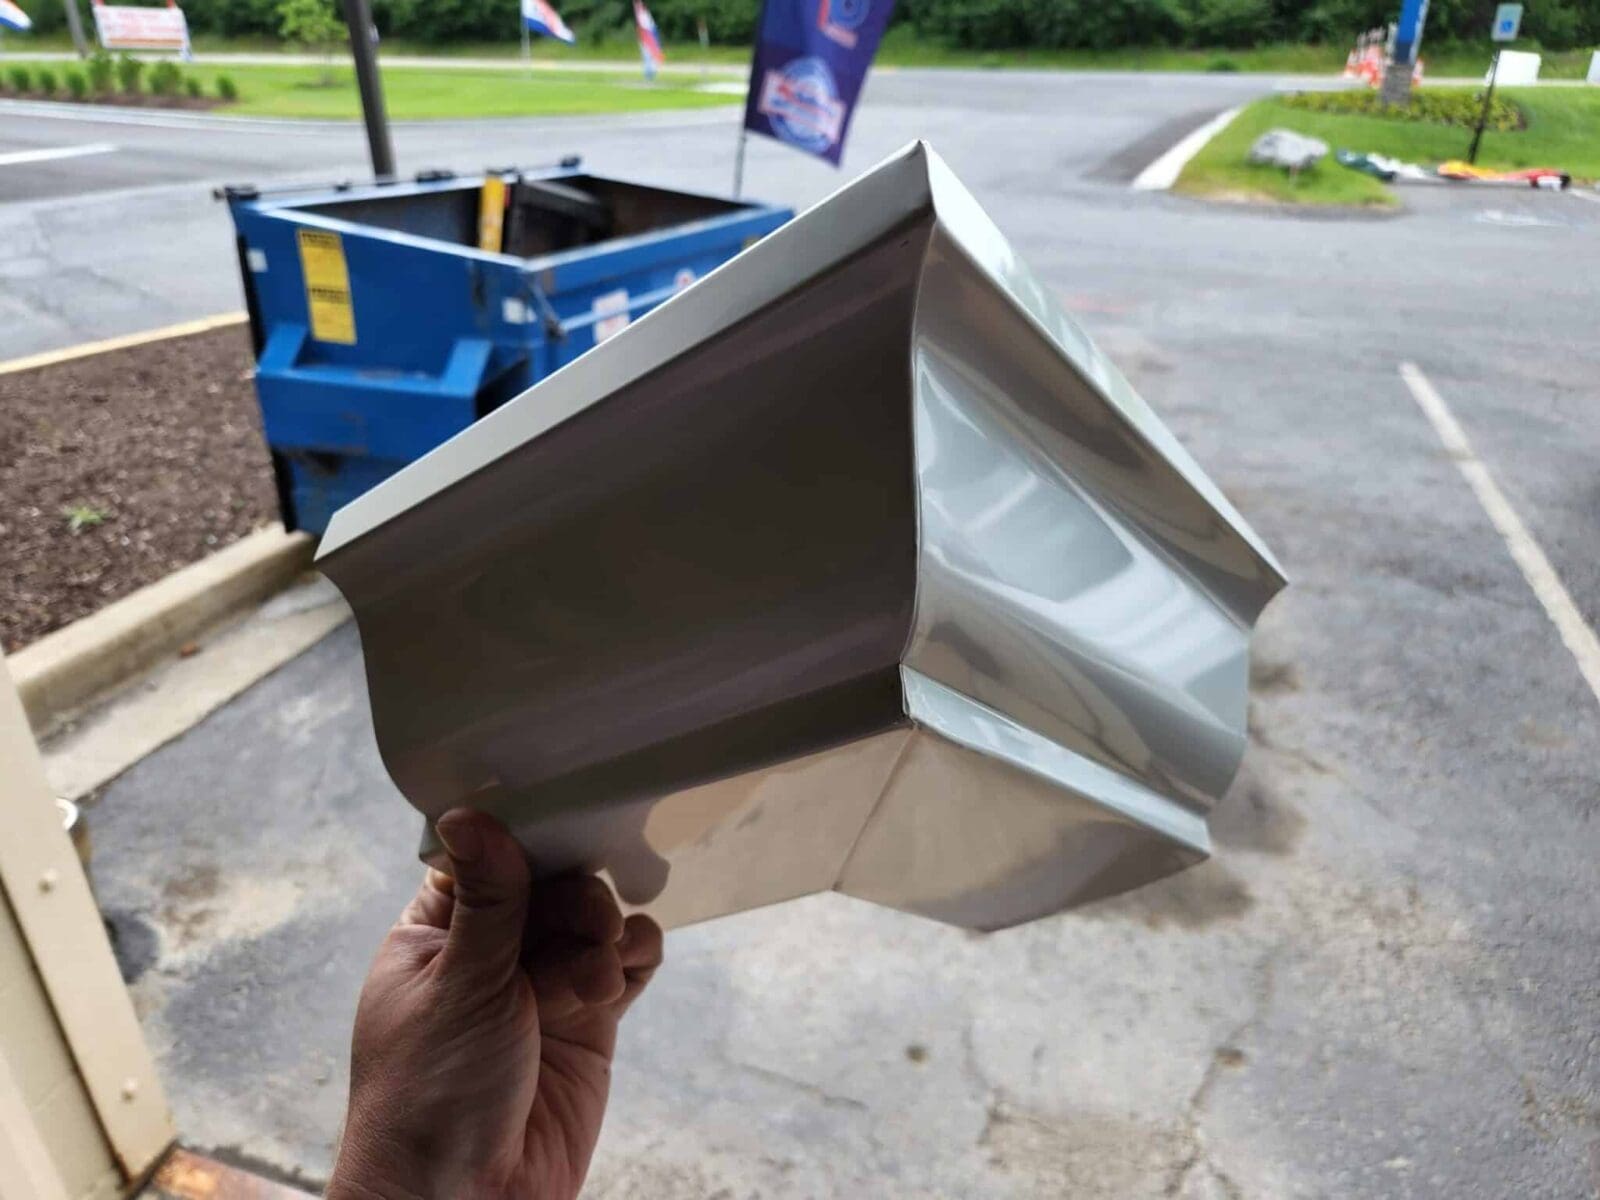
Miters are basically a corner section that two straight gutters meet at to form a corner. With a miter properly installed and sealed the water is now able to travel around corners from gutter to gutter.
Once the two gutter sections are slid into the miter all the seams are then caulked so the water can’t leak or drip through. Unfortunately the sealants do not last as long as the aluminum gutters, therefore miter leaks are a common thing to happen at least once during your gutter system’s life.
TYPES OF GUTTER MITERS
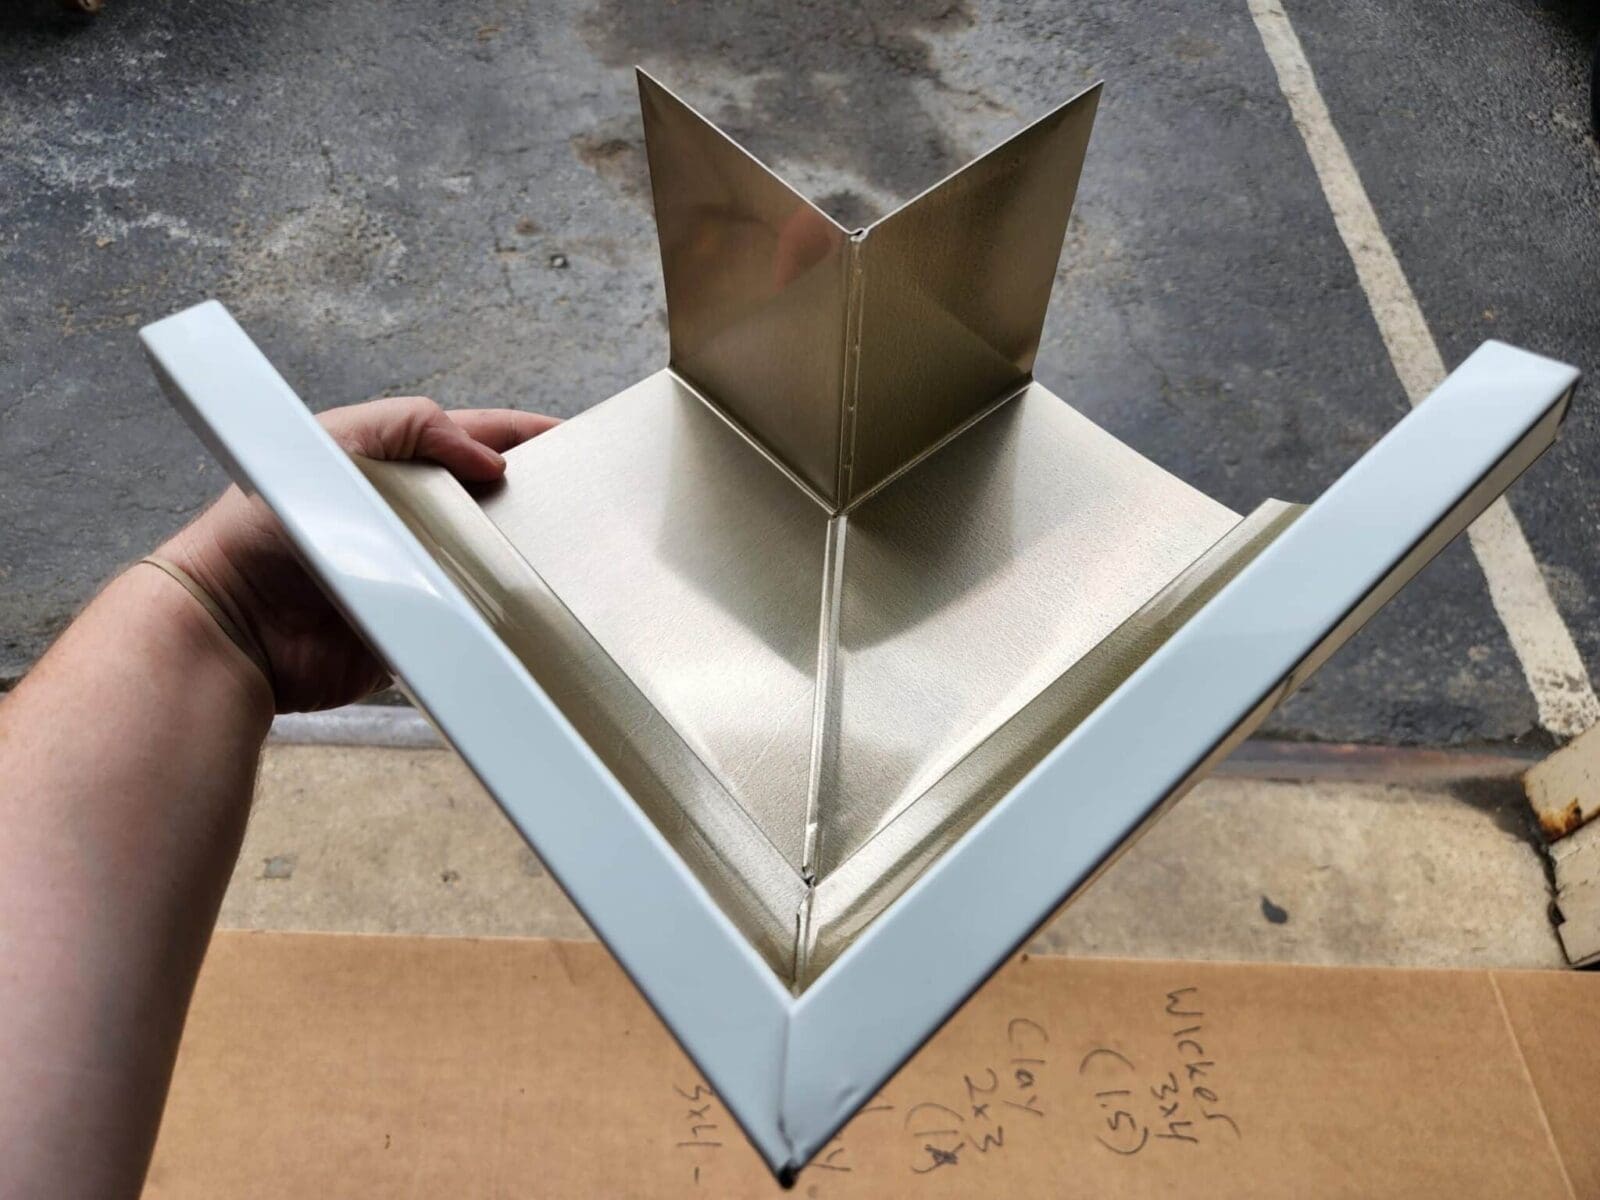
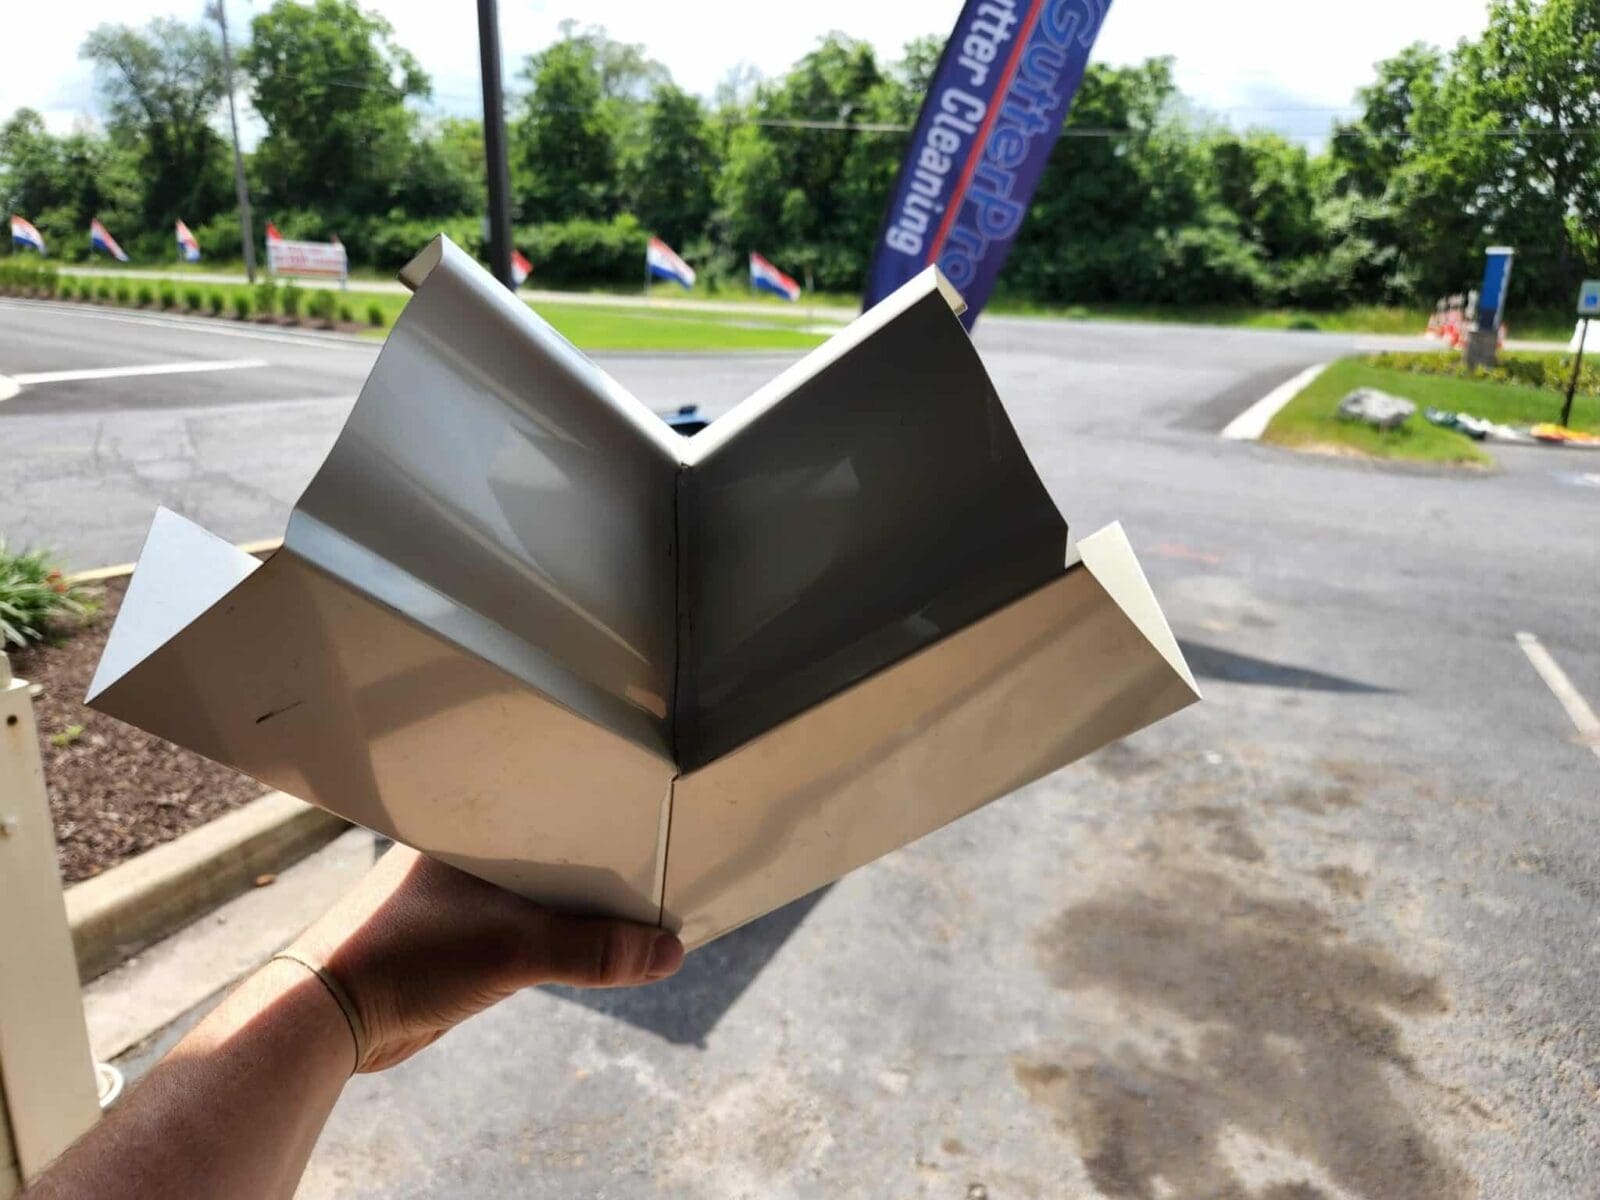
There are two main types of miters, Inside Miter and Outside Miter, and they are named in regards to which way the corner faces from the home. An Outside Miter points outwards, or away from the home. While an Inside Miter points inwards towards the home. That is the easiest way to describe it.
Box Style Gutter Miter
So far all of the photos we’ve shown in this article were a style of miter called box style miter. However there is another style of miter called a strip miter that does the exact same thing. The only difference is the strip is just a small strip of material that covers the seams whereas the box style extends past the seams and covers more surface area. Both are equally as effective if the gutters are cut correctly and in good condition.
Strip style are more common for new gutter installations and box style are more common for miter replacements. For new gutter installation, only a thin strip is needed to cover the essential seam. But with older miters it is usually easier to put a box style miter over all of the old seams and caulk.

SIGNS OF GUTTER MITER LEAKS
The best way to know if your gutters or miters are leaking is to observe your gutters during rain or soon after rain. The best way to know if your gutters or miters are leaking is to observe your gutters during rain or soon after rain. Leaking miters are very easy to spot as miters are only located on corners.
Gutter Leaking at Seam or Corner
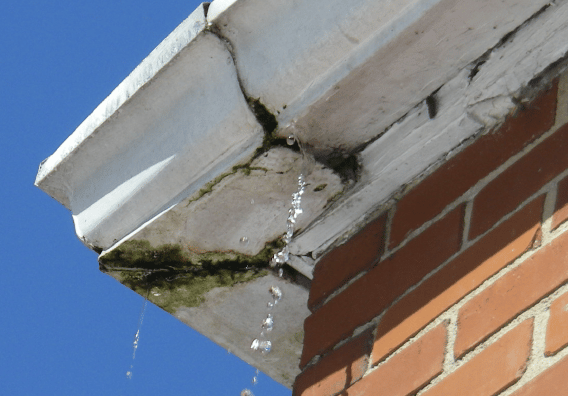
To know if any of your miters are leaking, simply take a lap (during rain) and look up to each corner section. If there is water pouring or leaking from the miter, (especially from the bottom), then the seal has likely worn out and the miter needs to be resealed.
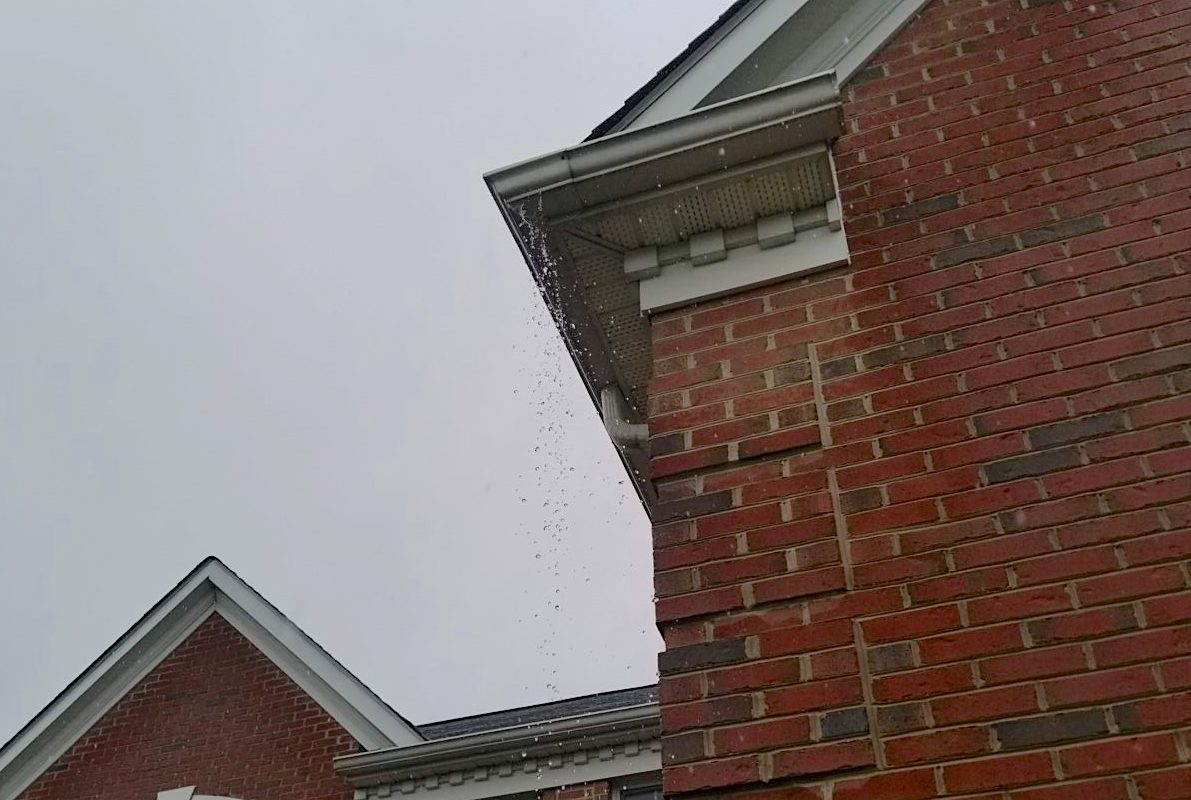
Keep in mind that if you have a clogged downspout near the miter, that the clog could cause the miter to appear as if it’s leaking. This is misleading when this happens. It is because the water can’t flush down the spout so it escapes from wherever it can. Basically when miters appear to be leaking very close to the downspout, it is actually just a clogged downspout and no sealing is needed. The photo below is a classic example of a miter that appears to be leaking, but it was actually a clogged downspout. You can notice the downspout is about two feet from the miter.
Ground Erosion Below Miter
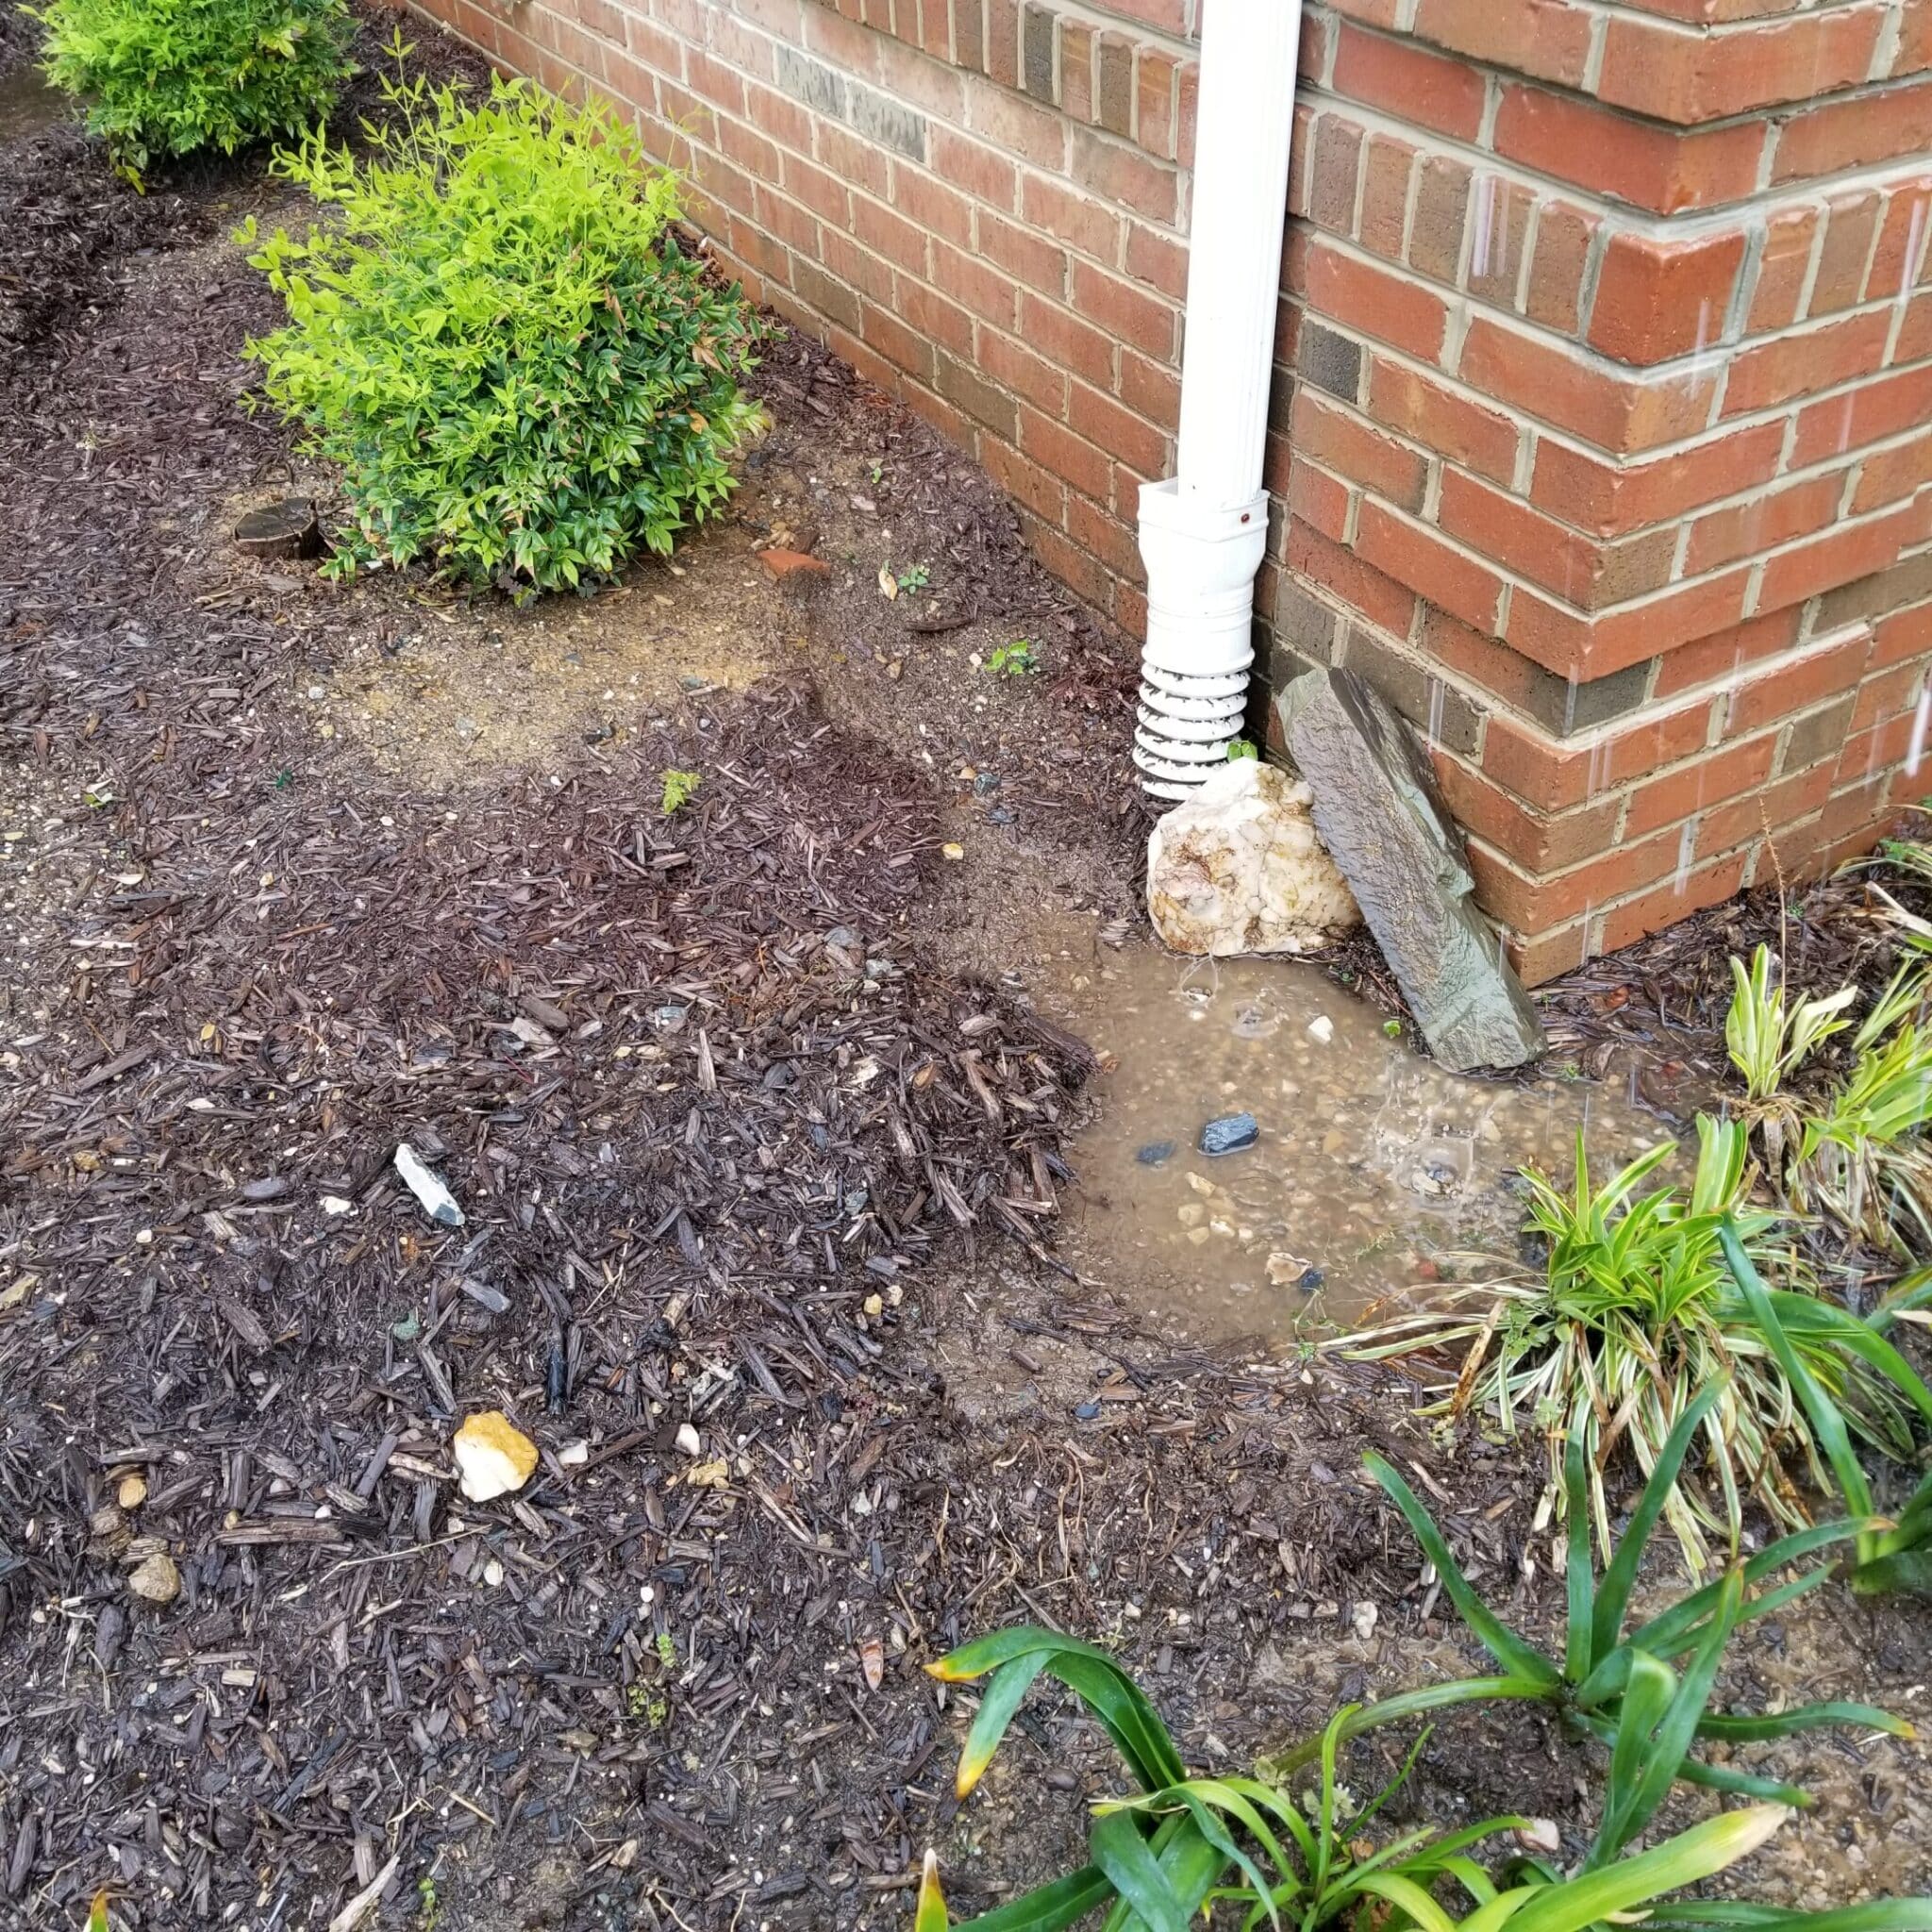
Besides seeing the miter leaking during or soon after rain, the other main way of identifying a leak is you will see ground eroding under the miter. If a leaking miter is above mulch it will almost always wash it out at the corner. You may even see the water pooling up under the section. Basement leaks could be caused from the water pooling up too close to the home. The photo below is the corner below the leaky miter in the photo above.
Icicles forming
Check out this short video clip below that shows how water slowly drips from a miter section. The cool thing is there is an icicle that has formed at the miter seam. This is a clear indication that the miter is leaking. You can see in the video that the other miter does not look like this. Keep in mind this video was recorded when snow was melting from the roof which is a perfect time to diagnose problems with the gutter system.
CAUSES OF MITER LEAKS
The two most common causes of Miter Leaks are gutter pitch issues and clogged gutters. Most problems with miter leaks can be traced back to one of these issues.
Gutter Pitch Issues
The most common cause of all miter leaks or problems is due to the gutter pitch not being correct. All gutters are pitched or sloped so that the water drains freely towards the downspout. When gutter pitch is off then the water can’t drain properly. Once this happens the only way for the water to escape is finding places to leak through or to evaporate.
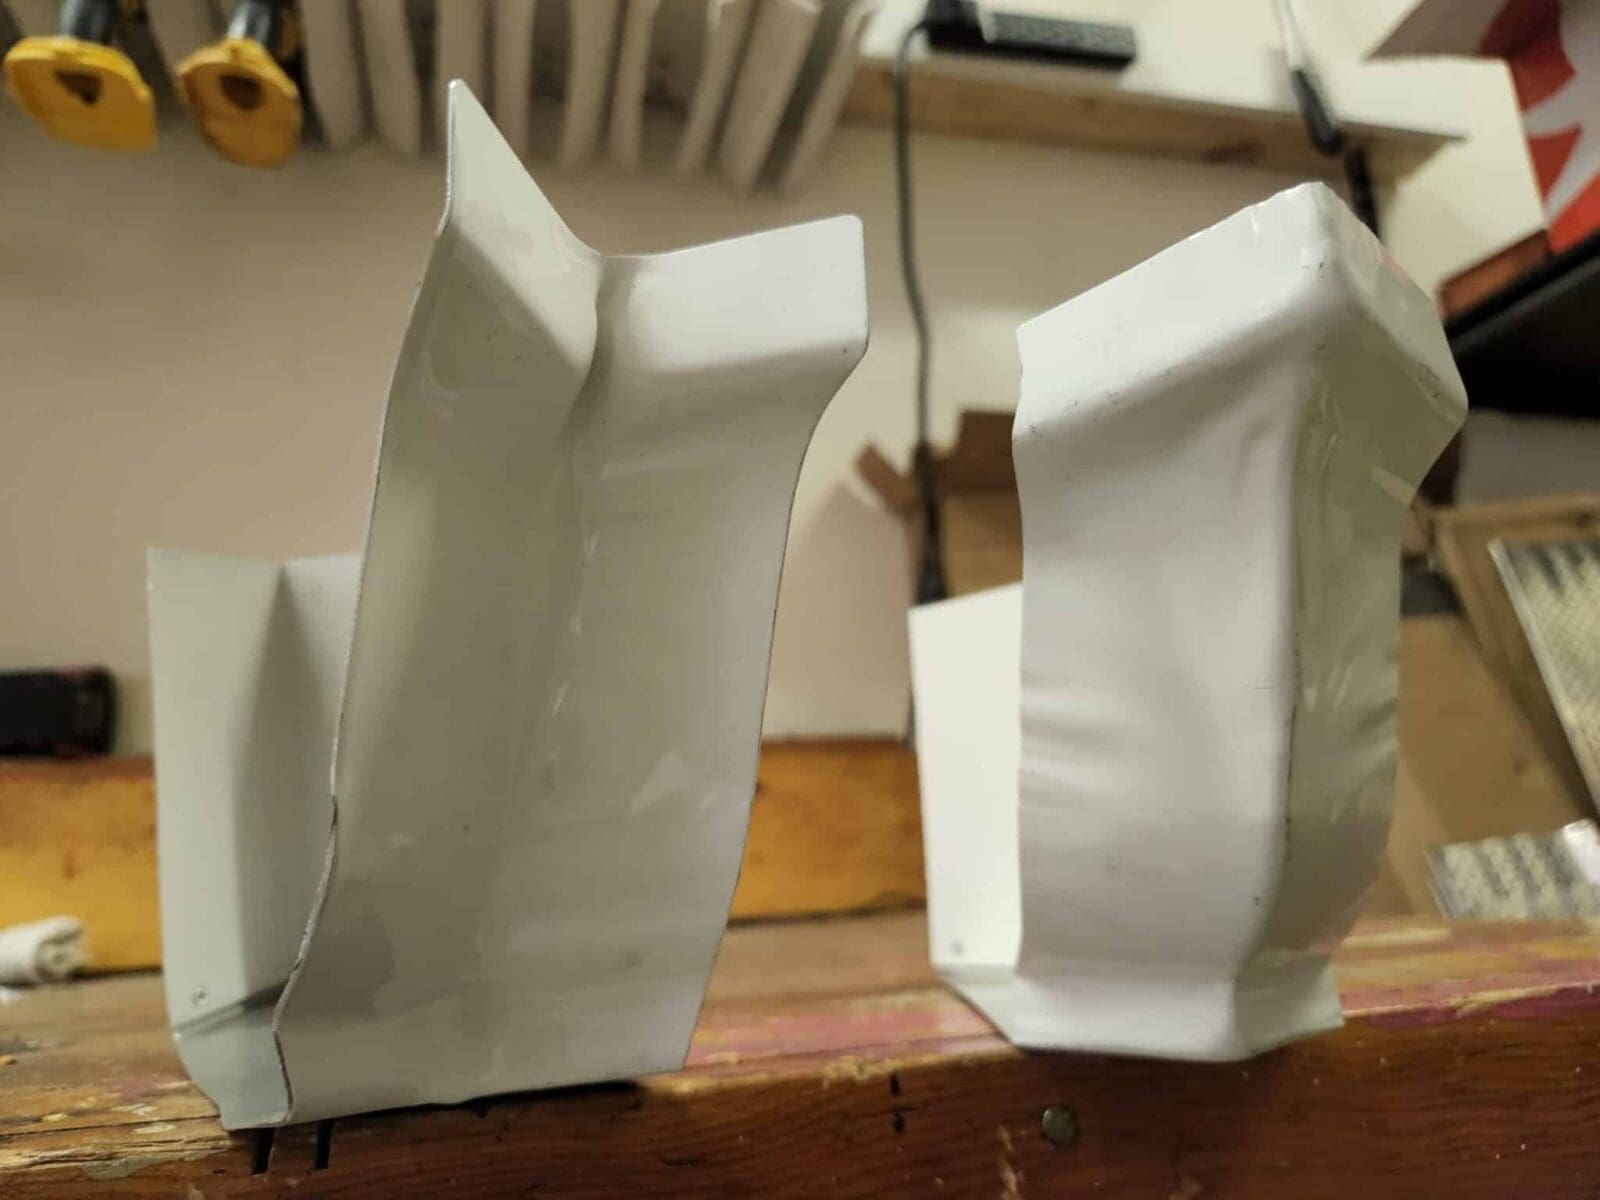
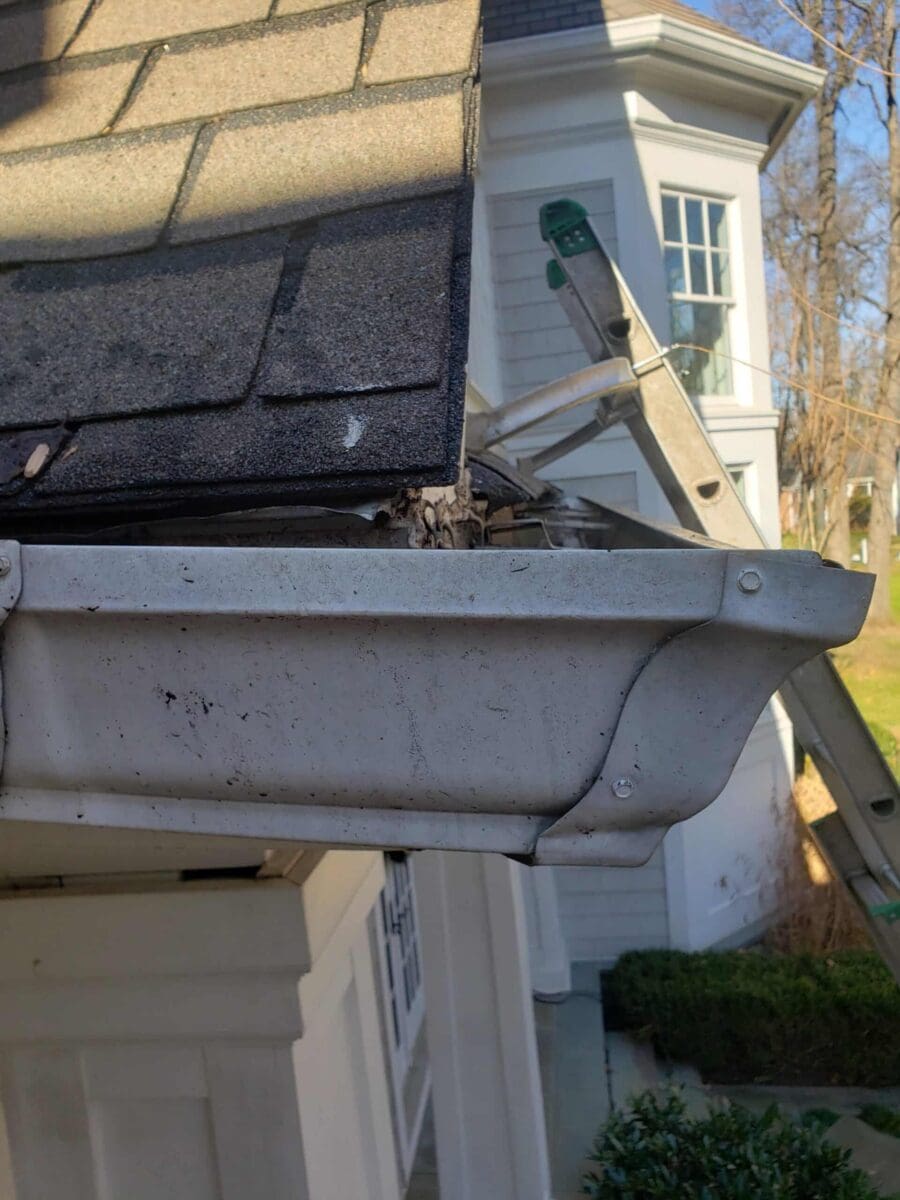
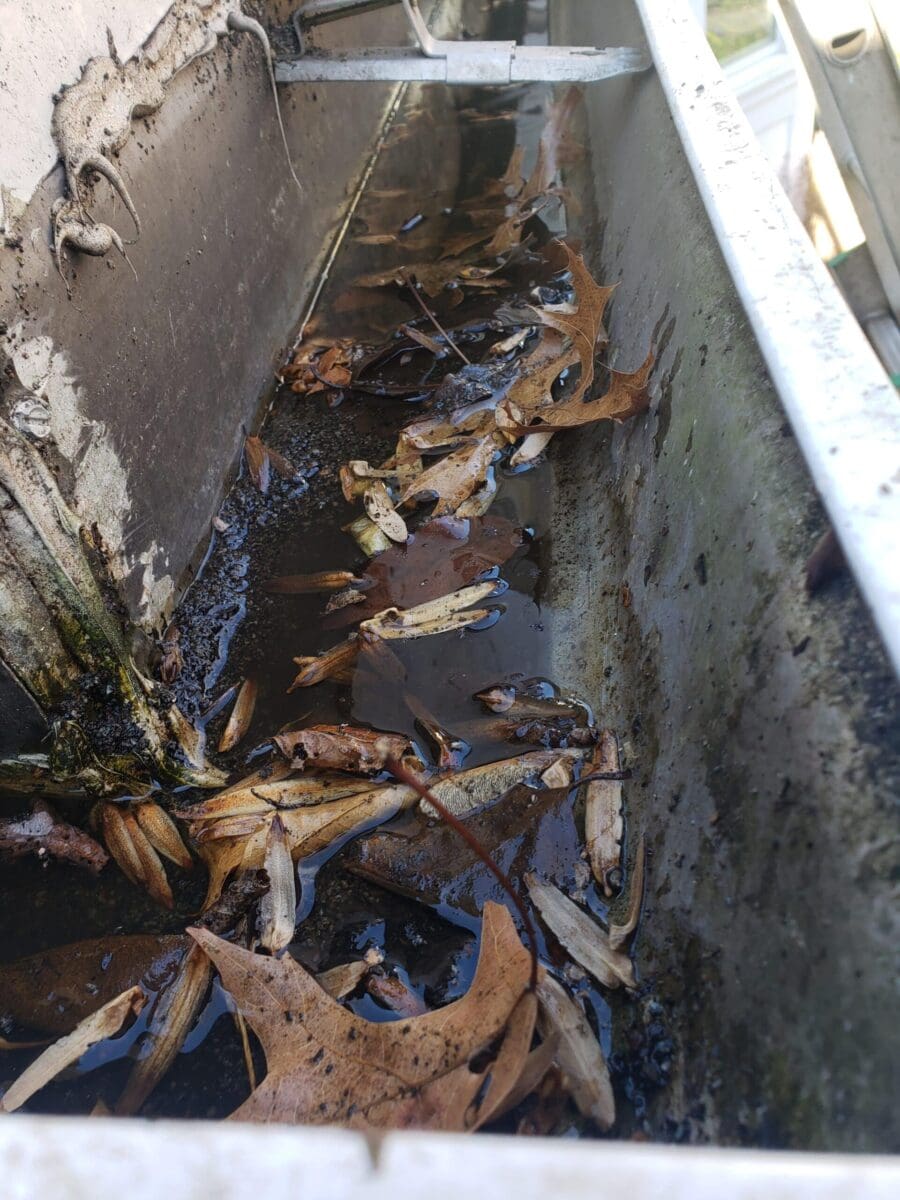
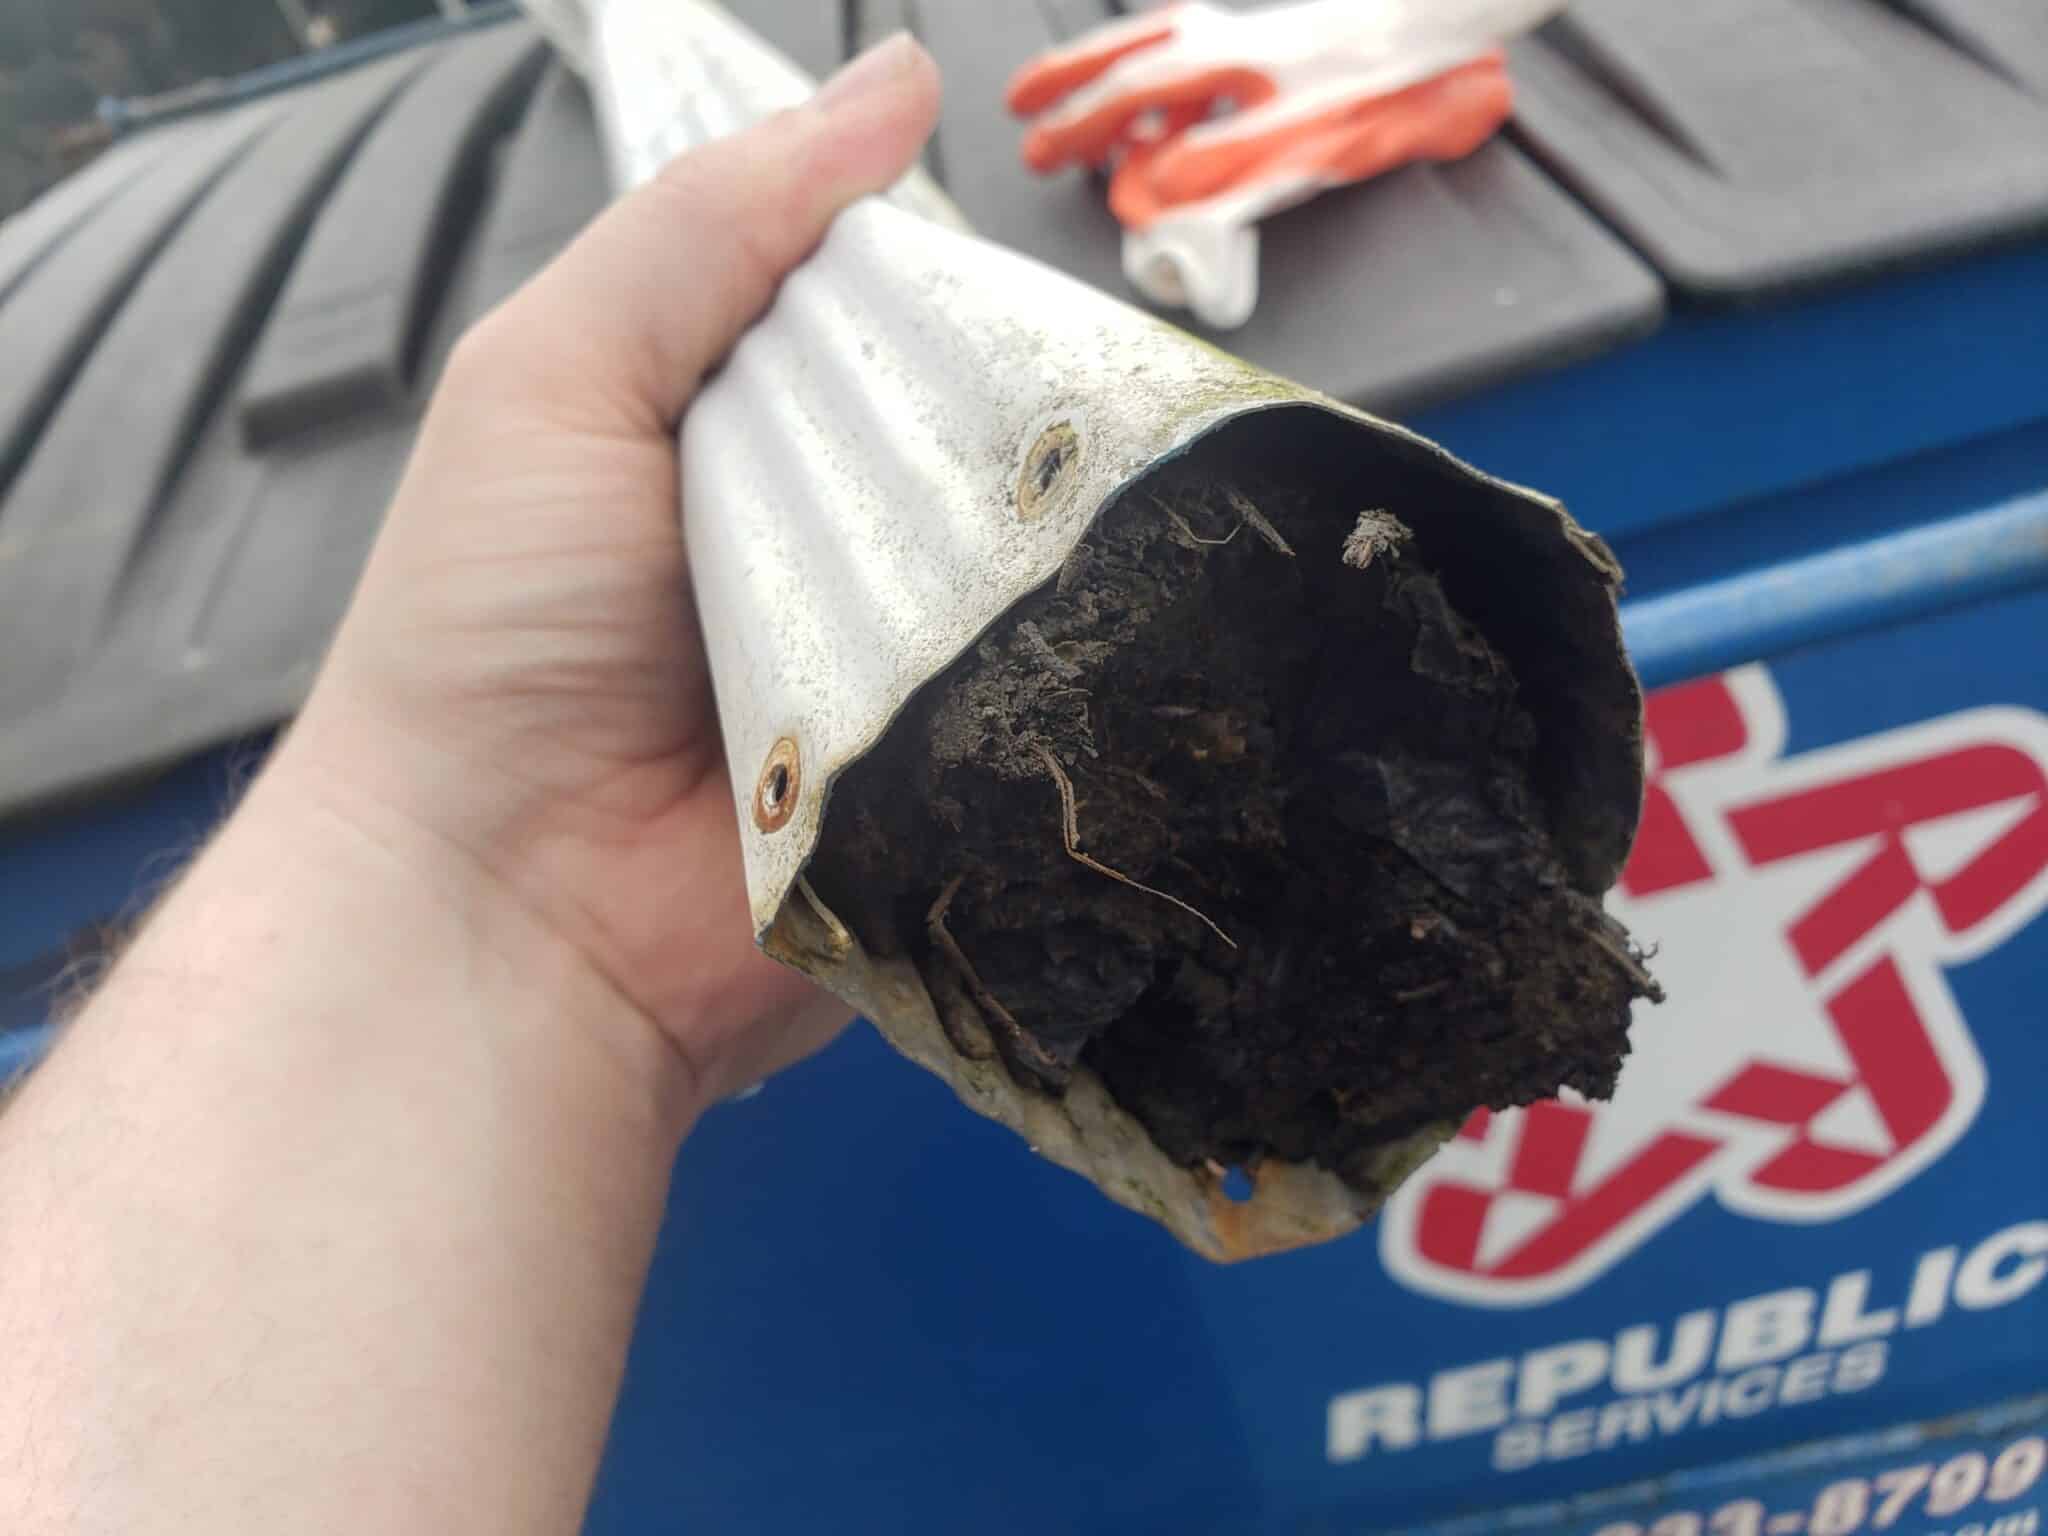
In the two photos below you see a perfect example of a miter that is sagging at the corner. When the corner is the low spot the water has no where to go. Then the next photo shows the inside of that same miter. You can see the water and debris that are trapped in this section. Since water can’t flow up hill this will be stuck here until it evaporates or leaks.
One thing to remember is that the more corners (miters) you have in a run of gutters, the harder it is to configure the pitch properly. For example, a straight gutter with no miters is going to be a lot easier to pitch. Whereas a gutter that goes around multiple corners will take a little more skill to configure so all sections drain properly.
Water Must Go Around Corners

The most important thing to remember with miters is that the water must get around the corners. When the pitch is off, the water is not making it around the corner. In the short video clip below you can see a gutter that has over about 2 inches of standing water with no where to go. Right around the corner from the miter is the downspout, but the water can not make it up and over this miter section.
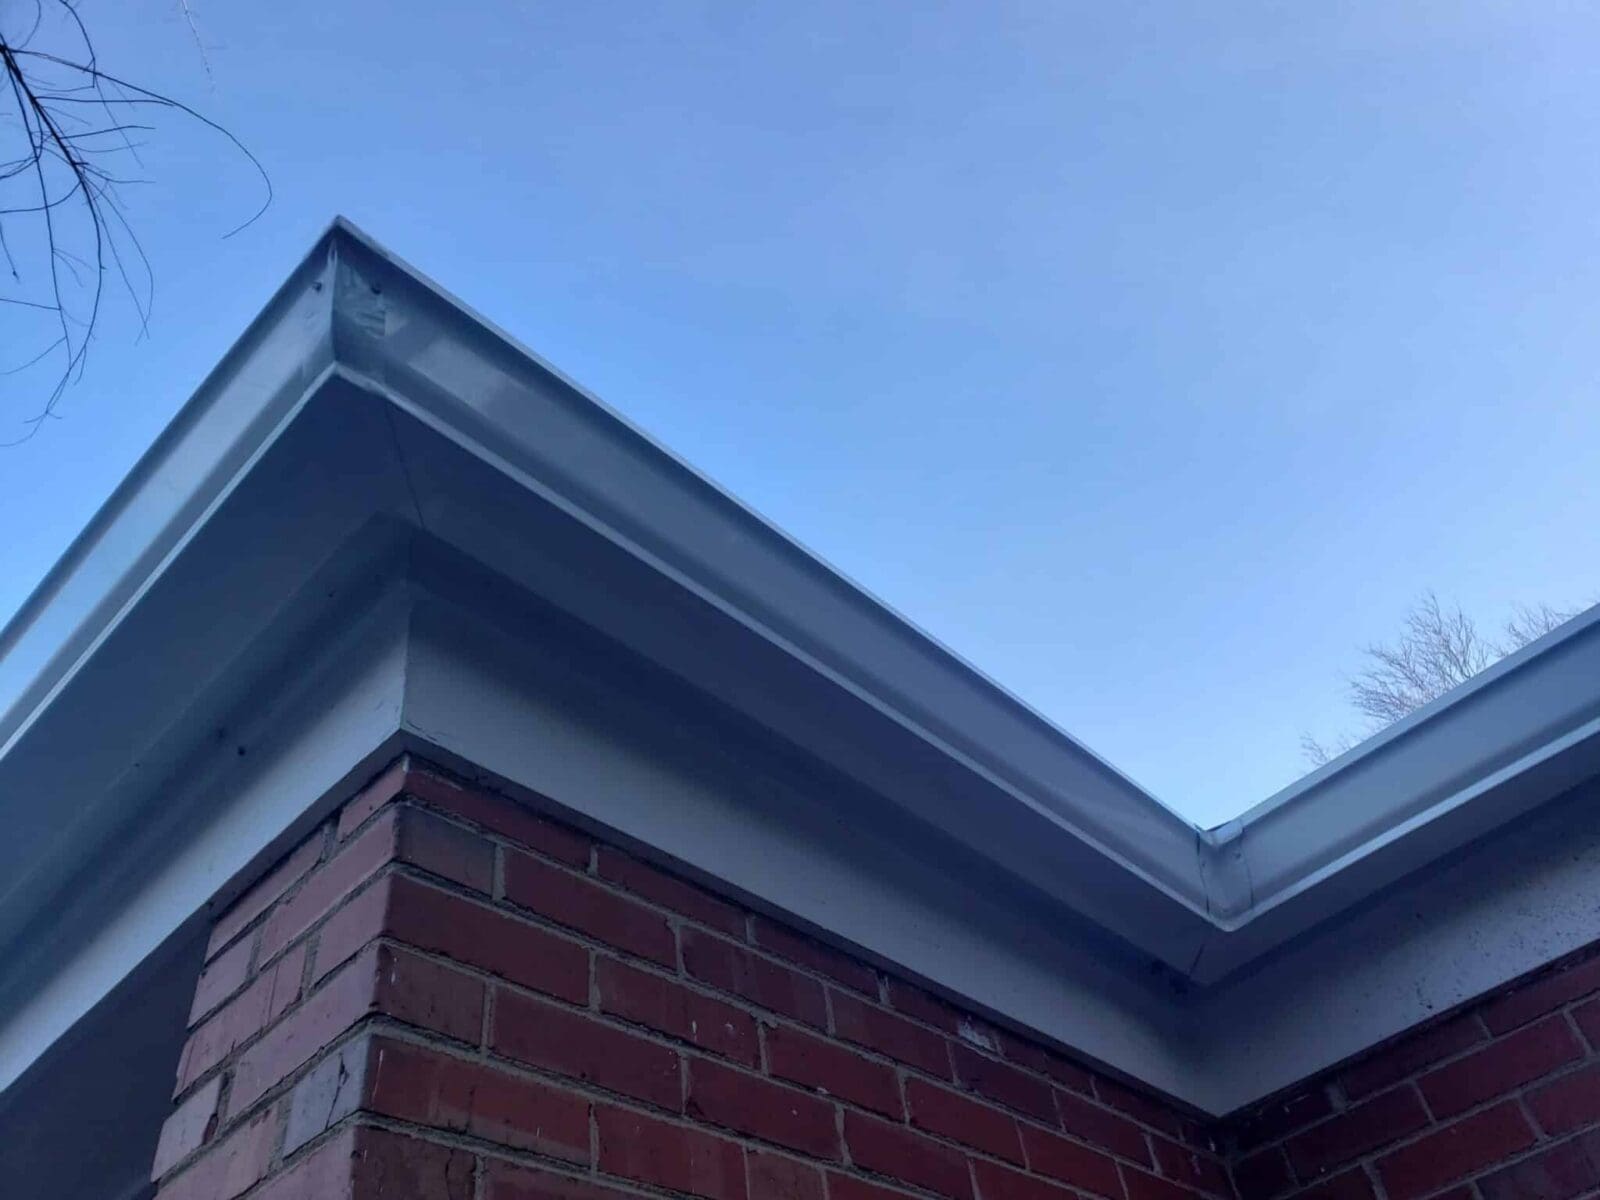
What needs to happen is both gutter sections and the miter need to be re-pitched or re-adjusted. Here are some photos of the same gutter and miter from the video. You can notice how the gutter is bone dry by the downspout but wet up to the miter. This is a tell tale sign that the water is not flowing where it needs to.

Clogged Downspouts
As mentioned above, a clogged downspout that is located near a miter will also cause the miter to appear to leak. When downspouts are completely clogged the water is not able to drain properly. If the gutters are tight and sturdy then they will fill up with water completely. Much like a bath tub the gutters will over flow once they fill up. But also the water is trying to escape through every seam it can find. The seams of the miters are the only seams in a seamless gutter system, so basically it is the only route for water to escape besides over the top.
The good news about clogged downspouts is that they are easy to identify and rule out. The tell tale sign that downspouts are clogged is when little to no water comes out of the downspout during rain. CLICK HERE for more information about Clogged Downspouts.
SIGNS OF MITER DAMAGE
Miters can leak because they are damaged as well. Here are some photos that show common examples of miter damage.

Loose Miter
When any part of the miter comes loose or unattached from the gutters. Seeing loose screws hanging from the miter would be a tell tale sign of this. The miter in the photo is able to be tightened and re-sealed.
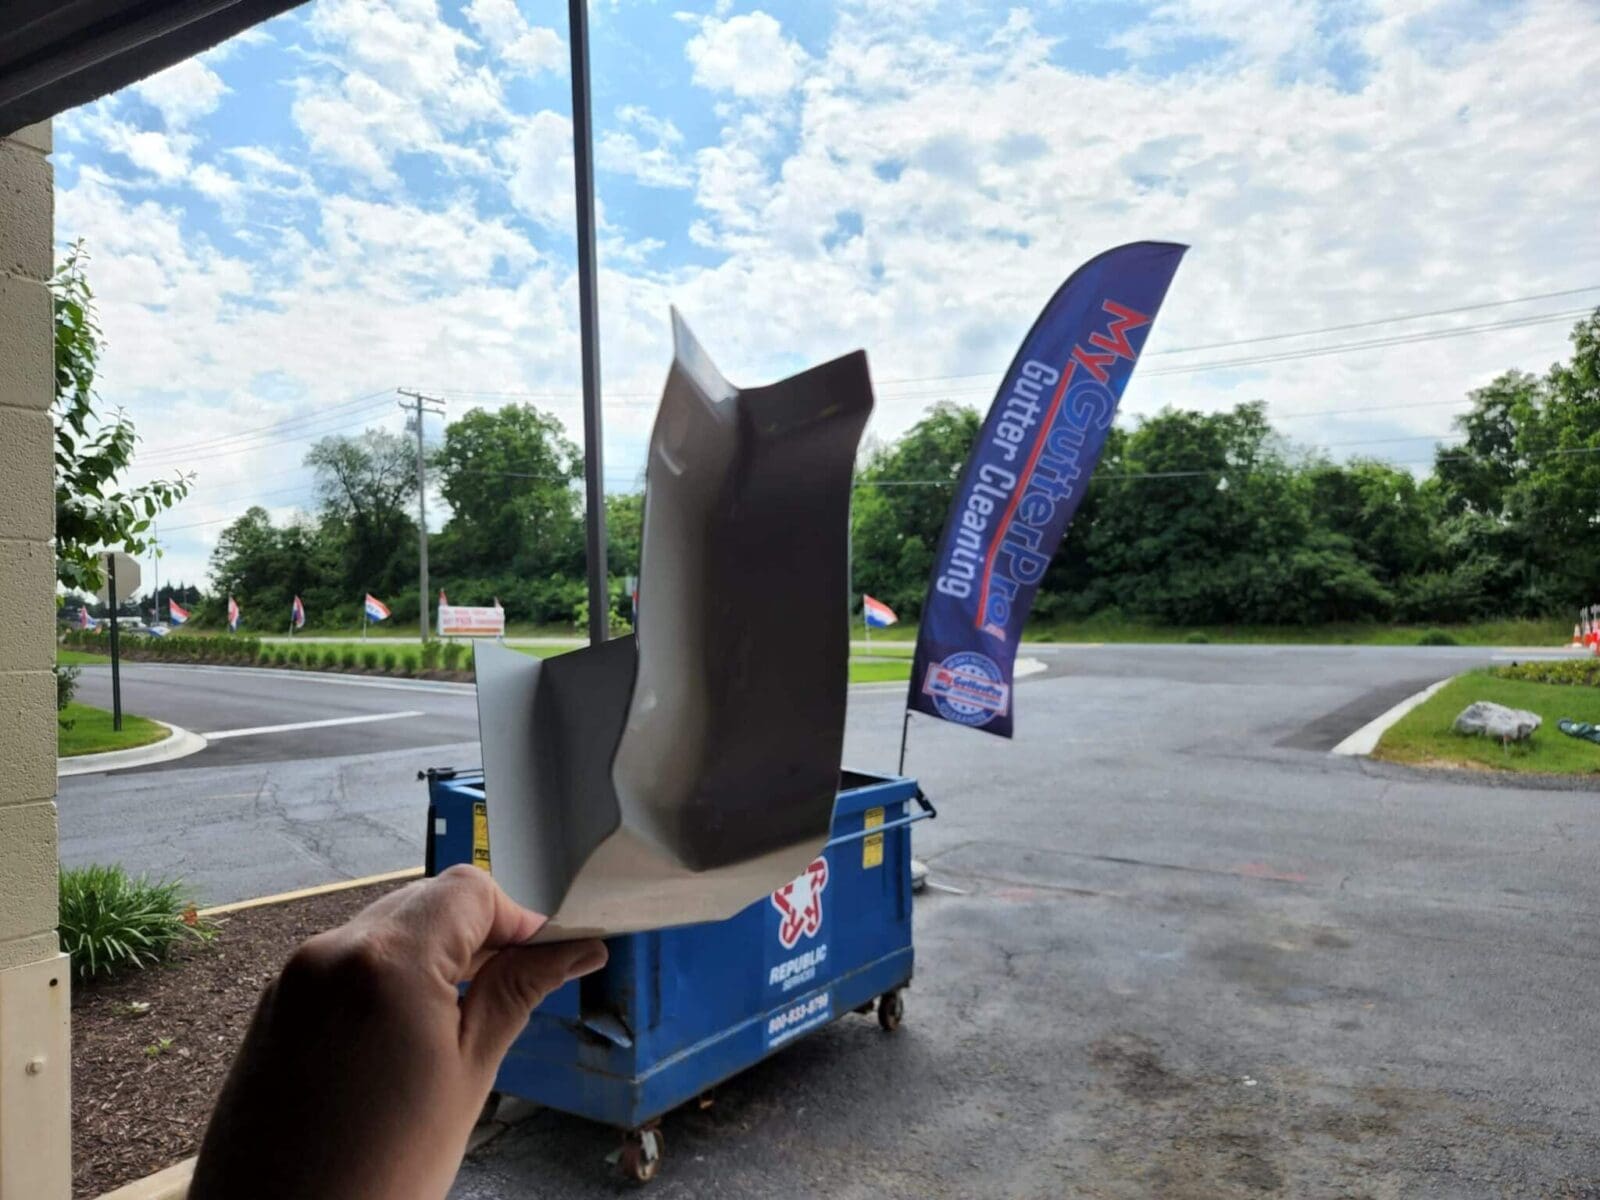
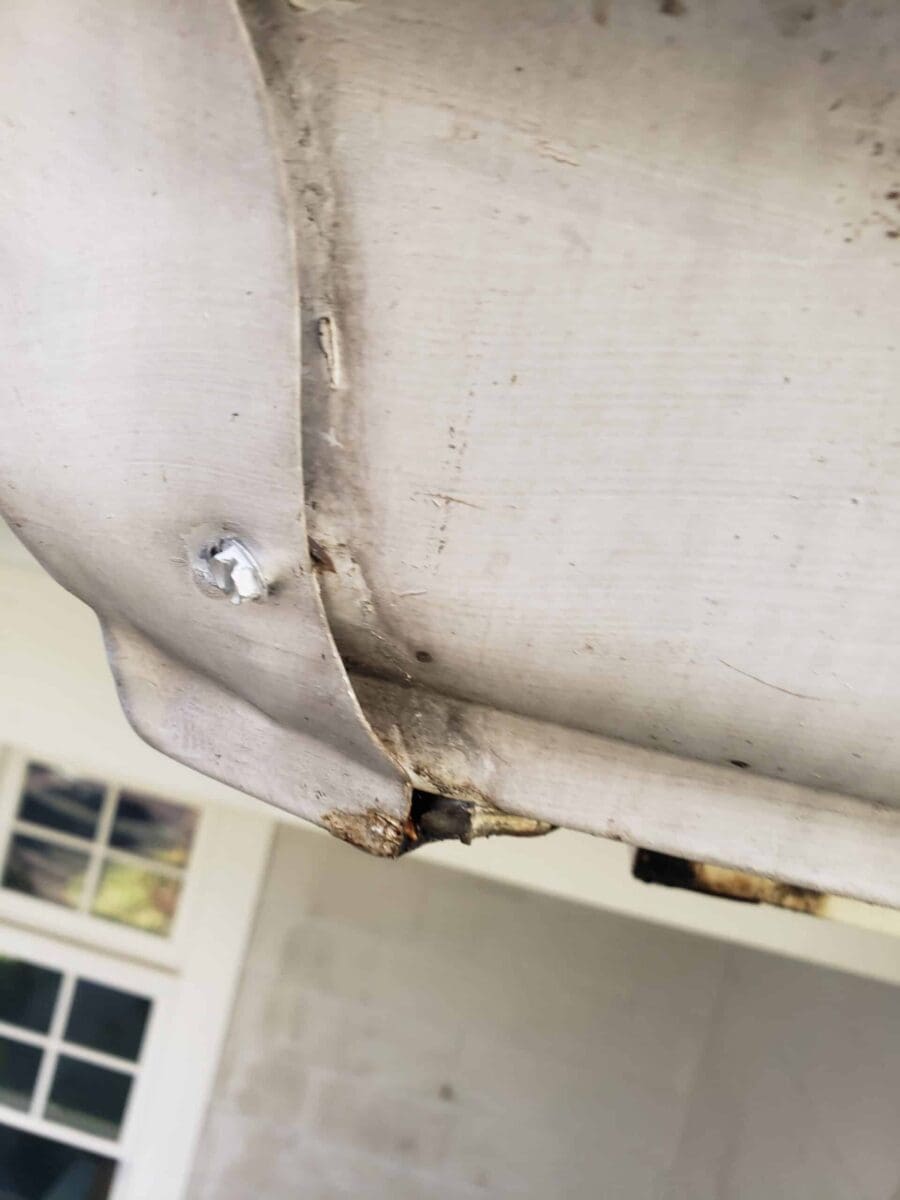
Bent Miter
If any section of the gutter system is allowed to bend at too extreme an angle it will bend or kink. Once this happens there is no turning back. in the middle photo below you can see the bent has a small tear in it. If any section of your gutter system tears like this , especially miters, that piece needs to be replaced.
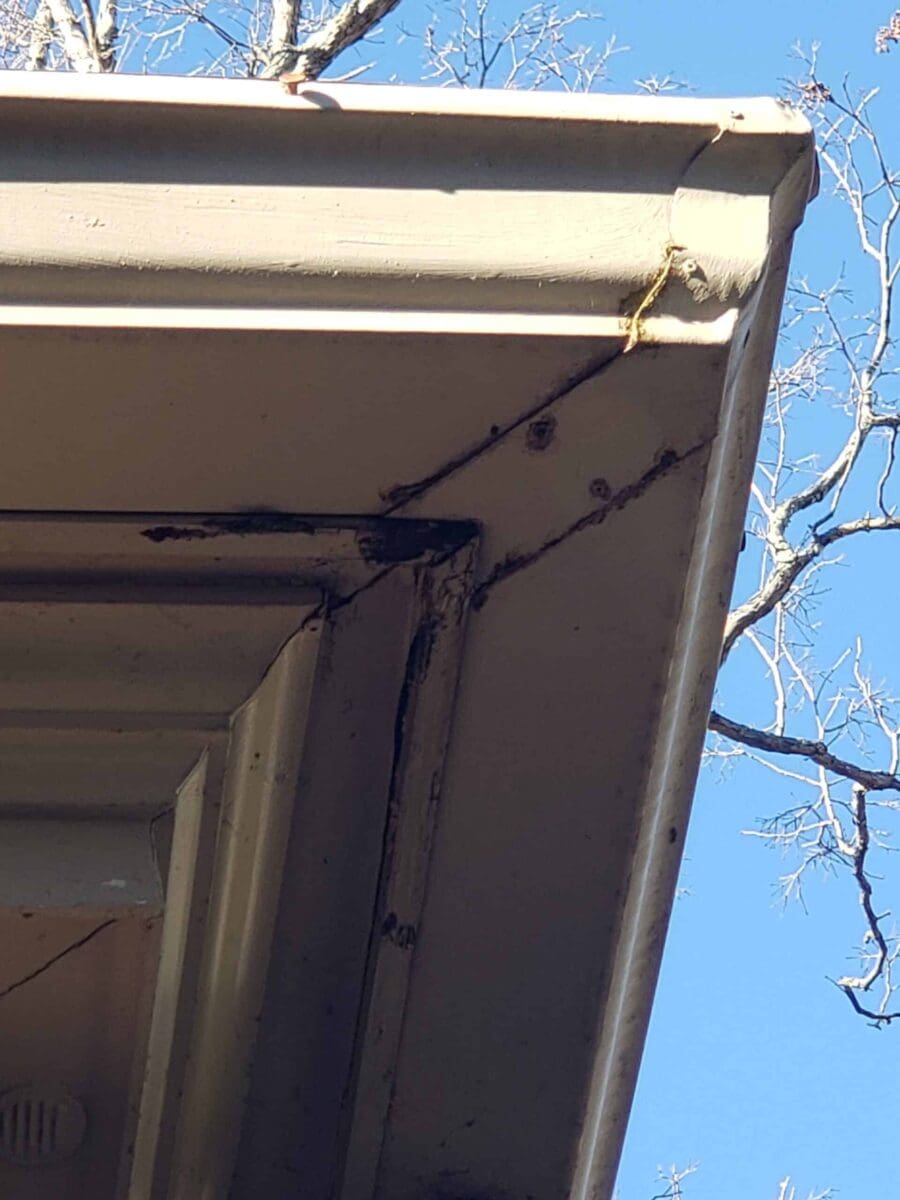
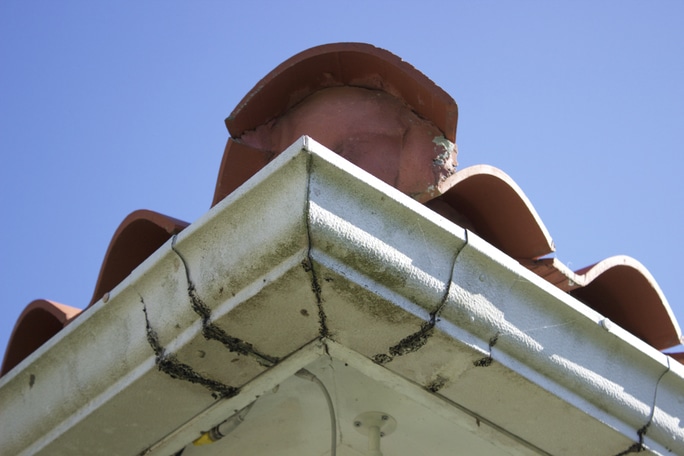
Miter Corrosion
Corrosion on the miter is usually black, green, or rust colored. In the right photo below you can see what looks like rust or corrosion on the miter seams. There are a couple factors that cause this to happen. The seals being old is the most common. Once the seals give way you’ll see more and more stain on the seams. Heavy debris accumulation in the miters is another direct cause of this. If debris is allowed to sit in the corner and decompose then it will gunk up this corner and the seals quickly. And the third option here is actual rust forming on the sections. The main cause of rust in gutters is excessive pollen and extreme temperature fluctuations. CLICK HERE for more information about gutter rust.
Have any questions? CLICK HERE to email My Gutter Pro!
Follow My Gutter Pro on Instagram
Subscribe to our YouTube Channel

MY GUTTER PRO
93 MONOCACY BLVD. A-6
FREDERICK, MD 21701